| Prep: 30 mins | Cook: 45 mins | Difficulty: Medium | Serves: 6 |
| kcal | fat | saturates | carbs |
| 355 | 14g | 6g | 54g |
| sugars | fibre | protein | salt |
| 22g | 2g | 4g | 0.1g |
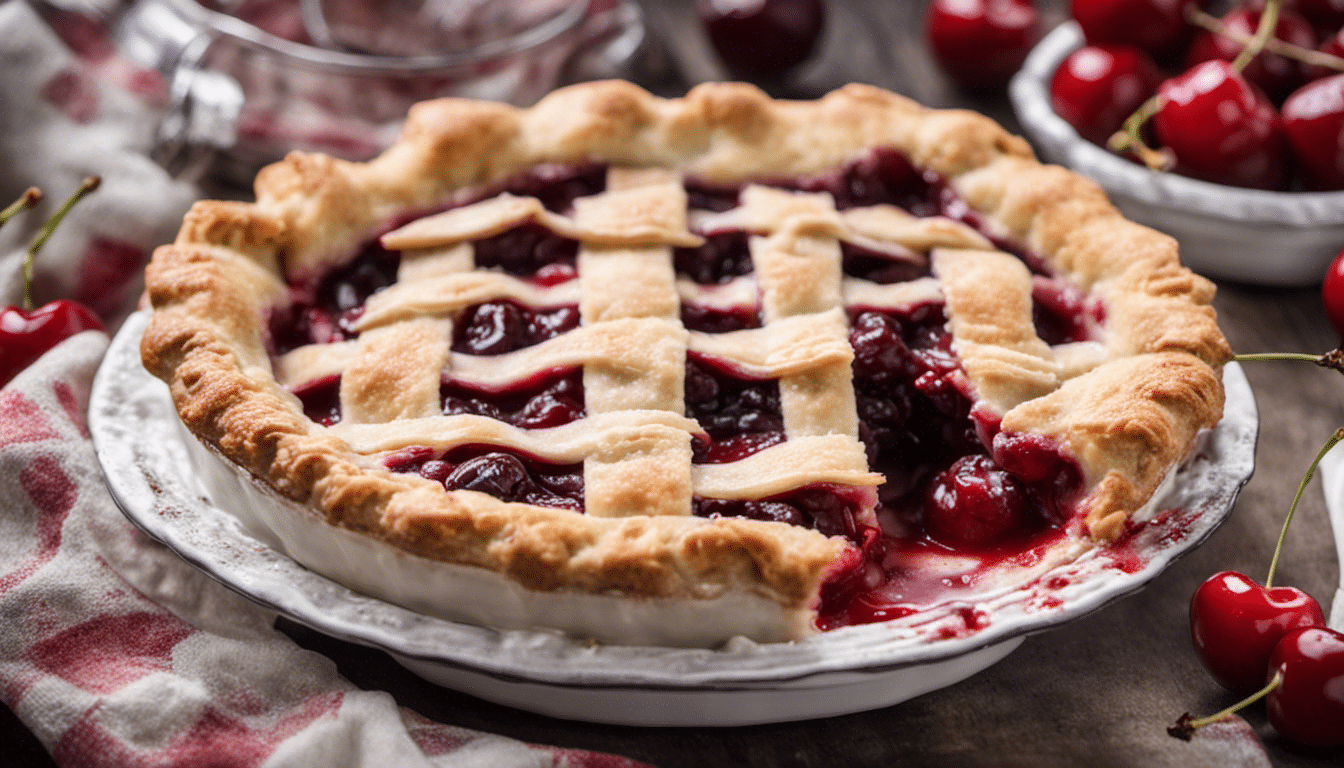
There’s a certain magic that happens when a humble list of ingredients – some sugar, a handful of cherries, a squeeze of lemon juice – are brought together to create the beloved American classic: Cherry Pie. This dish is all about transforming simple items into a gastronomic experience that takes you back to sweet childhood memories, a tantalizing taste of nostalgia in every bite.
The Cherry Pie Connection
Allow me a moment of indulgence as I narrate how this Cherry Pie recipe has personally captivated me. It might not be sushi or sashimi, but it speaks infinitely about the place I was raised. Seattle is home to some of the best produce in the Pacific Northwest, cherries included. Memories of jubilant summers spent plucking these ruby gems off trees play back in my mind every time I indulge in a slice of this pie. This is my ode to the sweetness of home, held together with the warmth of buttery crust, echoing the love and care in every traditional Japanese meal I prepare.
Fusing Traditions
Though my work often entails artful displays of sushi and intricate Japanese dishes, I’ve always had a soft spot for dessert. This Cherry Pie might seem a long journey from my Japanese Seafood specialties, but deep down there exists the same devotion – to quality ingredients, respect for traditional techniques, and the desire to create a sensory food experience. Much like how I integrate the Pacific Northwest’s oceanic bounty with Japanese methods, this pie encompasses the union of American baking traditions with my respect for nature’s produce.
A Healthful Dessert Option
While it’s important to remember that desserts like Cherry Pie are an indulgence, this recipe offers a surprising range of health benefits, too. Cherries are packed with antioxidants and anti-inflammatory compounds, contributing to heart health and aiding in sleep quality. Add to this a touch of lemon juice which provides a burst of vitamin C, bolstering our body’s defence mechanism.
This Cherry Pie recipe finds its kinship with the likes of sweet, fruity tarts and rustic galettes. It would make the perfect end to a Sunday roast or even stand as a star on a holiday dessert spread. Are you ready to experience this scrumptious slice of American nostalgia spiced up with an international perspective? If so, preheat your oven and roll out your pie crusts. It’s time to bake!
What You’ll Need
- 2 cups Fresh or Frozen Cherries
- 1 cup Granulated Sugar
- 2 tablespoons Cornstarch
- 1/4 teaspoon Salt
- 1/2 teaspoon Vanilla Extract
- 1 tablespoon Lemon Juice
- 1 tablespoon Butter, unsalted
- 1 Egg Yolk
- 1 tablespoon Water
- 2 Pie Crusts
Method
Step One
Preheat oven to 375 degrees F(190 degrees C). Remove the pits from the cherries if you’re using fresh cherries. If you’re using frozen cherries, allow them to thaw.
Step Two
Take a large mixing bowl, add the cherries, sugar, cornstarch, salt, vanilla extract and lemon juice. Stir them until all the cherries are well coated in the mixture. Let this mixture stand for about 10 minutes to allow the flavors to mix.
Step Three
Next, roll out one of the pie crusts and place it in a 9-inch pie dish. Make sure that it lines the bottom and sides of the dish.
Step Four
Pour the cherry filling into the pie crust. Smooth the top with a spoon. Dot the top of the cherry filling with small pats of butter.
Step Five
Roll out the second pie crust. You can either cut it into strips to make a lattice top, or simply place it over the filling. If you opt for the latter, cut several slits in the top to allow steam to escape.
Step Six
In a small bowl, beat the egg yolk with the tablespoon of water. Brush this egg wash over the top crust. This will give the pie a glossy finish.
Step Seven
Bake the pie in the preheated oven for about 50 minutes, or until the crust is golden and the cherry filling is bubbling. Allow the pie to cool for at least two hours before slicing and serving.


