| Prep: 20 mins | Cook: 40 mins – 45 mins | Difficulty: Medium | Serves: 6 |
| kcal | fat | saturates | carbs |
| 425 | 15g | 6g | 65g |
| sugars | fibre | protein | salt |
| 42g | 3g | 4g | 0.02g |
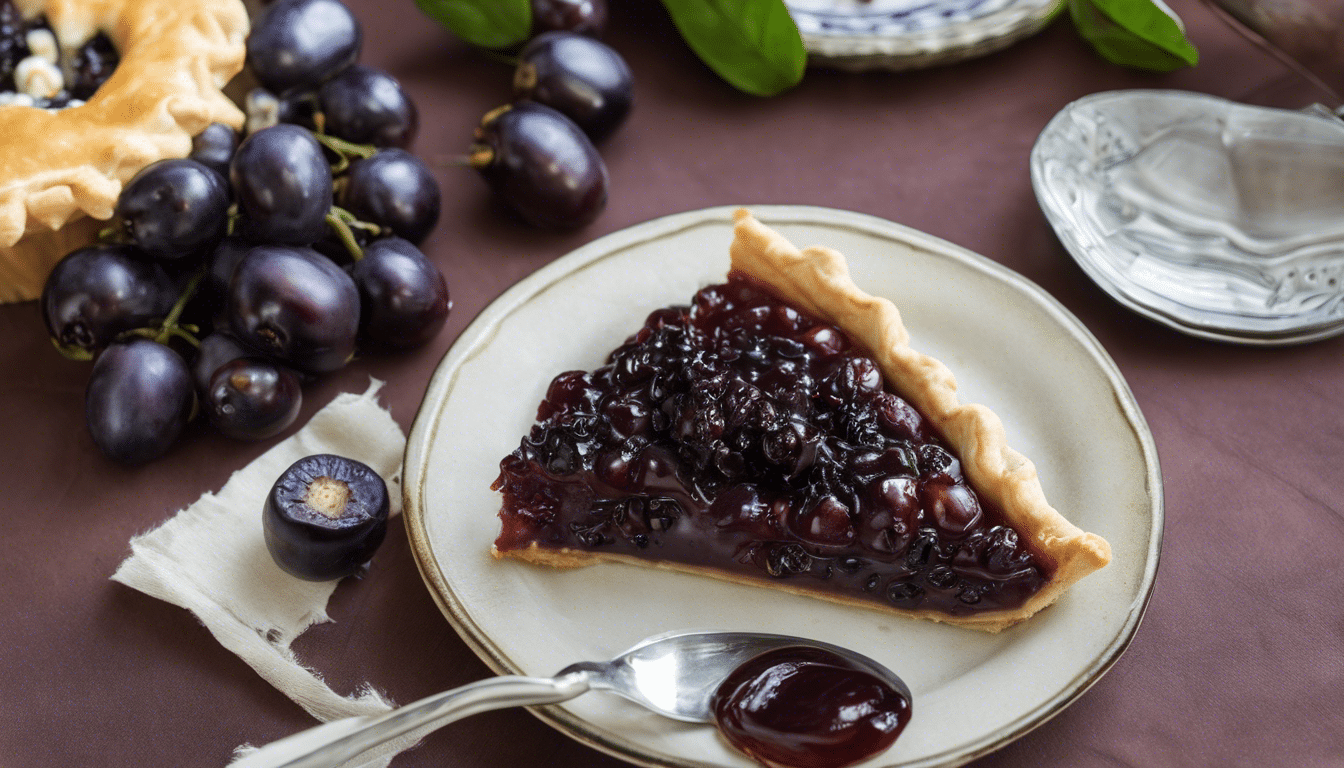
There’s something enchanting about this Jabuticaba Pie recipe. It’s the quintessential fusion of my West Coast roots, and our beloved American dessert tradition. Imagine the combination of sweet and slightly tangy Jabuticaba berries cloaked in a flaky crust that breaks open at the touch of a fork! The hints of freshness from the lemon juice balance the sweetness of the luscious berries, making each bite an exciting, tongue-tingling experience. Whether it’s a Sunday dinner dessert or a special holiday treat, this Jabuticaba Pie is bound to be a palate pleaser.
The Art of Balance
What I particularly love about this recipe is how it balances health and heartiness. The Jabuticaba berry is well known amongst health-conscious food lovers just like us Californians. Bursting with antioxidants, these berries can assist with inflammation, and it’s even suggested that they might have some cancer-fighting properties (source). Yet, we’re not just eating them raw – we’re turning them into a gratifying and heartwarming dessert. Crunchy crust aside, each bite holds the promise of the sun-kissed freshness of these berries, reminding us of the simplicity found in nature’s ingredients.
Pairing Possibilities
This Jabuticaba Pie works wonderfully as a stand-alone dessert, undoubtedly, but if you’re looking to create a harmonious dining experience, there are plenty of other dishes it pairs well with too. My first suggestion would have to be a simple roast chicken with a side of creamy mashed potatoes. The classic comfort of a roast chicken contrasts beautifully with the light, berry-filled pie. Not to the mention, the sweetness of our pie would complement a glass of semi-sweet white wine perfectly, forming a perfect feast for the senses.
If you are familiar with the classic blueberry pie or blackberry pie, the Jabuticaba Pie gives off a similar dynamic yet with a unique twist. While better known berries tend to offer more juiciness, the Jabuticaba berries in this pie have a sweetness that’s just right, not overwhelmingly sugary. Plus, their delightful burst of tartness is balanced well by the buttery crust and sprinkle of tangy lemon juice.
From my sunny Californian kitchen to yours, I hope you will love this recipe as much as I do. So, wrap yourself up in your favourite apron, preheat that oven, and let’s make a Jabuticaba Pie that’s sure to win hearts!
What You’ll Need
- 2 cups fresh Jabuticaba berries
- 1 cup white sugar
- 2 tablespoons cornstarch
- 1 tablespoon lemon juice
- 1/8 tablespoon salt
- 1 store-bought pie crust
- 1 store-bought pie crust top
- 1 tablespoon butter
- 1 egg white
- 2 tablespoons granulated sugar
Method
Step One
Preheat your oven to 375 degrees F (190 degrees C). Meanwhile, take your pie crust and position it in a 9-inch pie dish. With a fork, gently prick the bottom of the crust. This will prevent it from puffing during baking.
Step Two
In a medium-sized saucepan, combine the Jabuticaba berries, white sugar, cornstarch, lemon juice, and salt. Stir to combine the ingredients and then place the saucepan over medium heat.
Step Three
Cook the mixture, stirring frequently, until it has thickened and started to bubble. This will usually take around 7-10 minutes. Remove from heat and allow to cool slightly.
Step Four
When the Jabuticaba mixture has cooled slightly, pour it into the pie crust. Spread it out evenly with a spatula or back of a spoon. Dot the top of the filling with small pieces of the butter.
Step Five
Place the second pie crust top over the filling, crimp the edges to seal it with the bottom crust. Make a few slits in the top crust to allow steam to escape during baking. Beat the egg white until frothy and brush it over the top crust then sprinkle it with the granulated sugar.
Step Six
Bake the pie in your preheated oven for about 35-40 minutes, or until the crust is golden brown. If the edges of the crust start to brown too much, you can cover them with strips of aluminum foil.
Step Seven
After the pie has baked, remove it from the oven and let it cool on a wire rack. Let it reach room temperature before you cut into it. This will allow the filling to set and make the pie easier to cut.


